Shiplap, #DemoDay and Farmhouses - oh my!
If you're like me, you're totally into Chip and Jojo, and the Southern dynasty they've built through their show and Magnolia Market.
Did you know that Joanna also has a blog? Yes, it's true! And yes, I'll wait while you go check it out.
Here's the link.
...
...Insert Elevator Music...
...
Back? Great! Told you I'd wait.
If you didn't see it while you were there, don't miss her Power Balls recipe.

Showing posts with label Recipes. Show all posts
Showing posts with label Recipes. Show all posts
Tuesday, November 1, 2016
Friday, August 7, 2015
Recipe: Guacamole Zucchini Pasta
Welcome back! Hope you've all had a great week.
Today I wanted to share a really simple recipe I made for dinner this week (remember, we are currently on our 21 day sugar detox - post here). It is a great recipe for anyone wanting a light dinner, something healthy, vegetarian, or even vegan! It's also really easy to customize with anything else you want to add - meats, additional vegetables, cheese, you name it.

Today I wanted to share a really simple recipe I made for dinner this week (remember, we are currently on our 21 day sugar detox - post here). It is a great recipe for anyone wanting a light dinner, something healthy, vegetarian, or even vegan! It's also really easy to customize with anything else you want to add - meats, additional vegetables, cheese, you name it.

Monday, May 25, 2015
Happy Memorial Day!
I hope that you get to enjoy a day off of work/school, relaxing and having fun with family and friends.
Remember the All American Progressive Dinner I did with Jaelan and Olivia? Well it is PERFECT for your Memorial Day meal!
Entre: Jalapeno Pimento Cheeseburger
Dessert: Apple Crumble Pie & Homemade Vanilla Ice Cream
Drinks: Red, White, & Blue Drink AND Beerita

Enjoy!
Until next time - -

Remember the All American Progressive Dinner I did with Jaelan and Olivia? Well it is PERFECT for your Memorial Day meal!
Entre: Jalapeno Pimento Cheeseburger
Dessert: Apple Crumble Pie & Homemade Vanilla Ice Cream
Drinks: Red, White, & Blue Drink AND Beerita

Until next time - -
Monday, May 11, 2015
All American Progressive Dinner: Jalapeno Pimento Cheeseburgers
Summer is just around the corner, which means Memorial Day is upon us. Can you believe it? And Memorial Day means picnics, swimming, grilling, fireworks, and relaxing. Those are pretty much all of the best summer activities all rolled into one day!
If you're trying to plan a Memorial Day menu (or haven't even thought about it yet), we are here to save the day! I've teamed up with Jaelan from Making Mrs. M and Olivia from Snyders Tell All to bring you an All American Progressive Dinner! So get your pen and paper ready for your grocery list, and prepare for a major drool-fest...
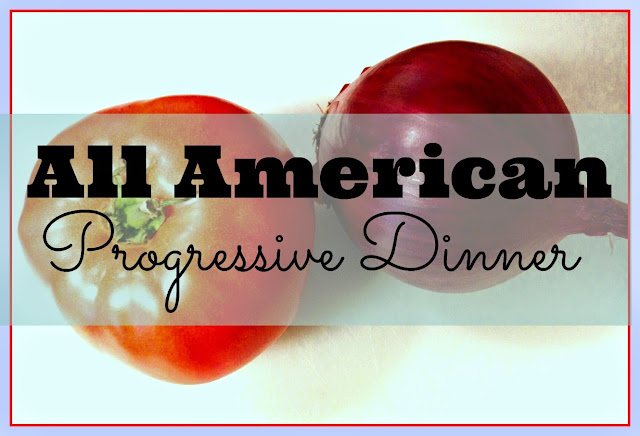
My leg of the progressive dinner was the entree. There are so many options out there that would be wonderful, but really, what says "AMERICA" more than a classic cheeseburger?
To pump it up a notch, I decided to make some jalapeno pimento cheese for a kick. And let me assure you, it did not disappoint!
Let's get started by making the pimento cheese.
Ingredients:
Directions:


What do you think? Do you have any Memorial Day recipes that you love?
Be sure to hop over to see Jaelan's homemade vanilla ice cream and apple crumble pie (droooool) and Olivia's Red, White, & Blue drink AND a bonus second drink recipe, a Beerita!!
Until next time - -
If you're trying to plan a Memorial Day menu (or haven't even thought about it yet), we are here to save the day! I've teamed up with Jaelan from Making Mrs. M and Olivia from Snyders Tell All to bring you an All American Progressive Dinner! So get your pen and paper ready for your grocery list, and prepare for a major drool-fest...

My leg of the progressive dinner was the entree. There are so many options out there that would be wonderful, but really, what says "AMERICA" more than a classic cheeseburger?
To pump it up a notch, I decided to make some jalapeno pimento cheese for a kick. And let me assure you, it did not disappoint!
Let's get started by making the pimento cheese.
Ingredients:
- 2 cups extra sharp Cheddar cheese
- 8 oz. cream cheese, softened
- 1/2 cup mayonnaise (trust me, use Duke's)
- 1/4 tsp. garlic powder
- 1/4 tsp. onion powder
- 1/4 tsp. ground cayenne pepper
- 4 oz. diced pimentos (drained)
- 1 small (seeded) minced jalapeno
- salt and pepper, to taste
Directions:
- Put all ingredients, except the salt and pepper, into a large bowl and blend with a mixer or by hand. If mixing by hand, be sure to press down on the cream cheese to be certain it gets incorporated evenly.
- Add salt and pepper to taste.
- That's it. Seriously.


The rest of the recipe is simple - just grill your burgers using your favorite seasonings (we went with salt, pepper, and garlic powder so we didn't steal the pimento cheese's thunder), and add toppings as you like. Lettuce, tomato, onion, mayo, mustard, ketchup...get creative and add some bacon, sauteed mushrooms, potato chips, whatever you want! The world (burger) is your oyster.
Here is how mine turned out. It was really messy to eat, but aren't all of the yummiest things? It was husband, sister-in-law, and brother-in-law approved.


What do you think? Do you have any Memorial Day recipes that you love?
Be sure to hop over to see Jaelan's homemade vanilla ice cream and apple crumble pie (droooool) and Olivia's Red, White, & Blue drink AND a bonus second drink recipe, a Beerita!!
Until next time - -
Monday, March 30, 2015
Krispy Eggs: An Easter Treat
Happy Monday!
It's good to be back. Sorry for leaving you hanging last week. Things have been really busy around here, but thanks for sticking with me.
Can you believe it's almost April? I feel like March never actually happened. Where is the time going!?
With the arrival of April, means Easter is around the corner. I love Easter. Pastel colors, egg hunts, a delicious lunch, and most of all, the meaning behind the holiday.
This year, Spencer and I will be going to see my family in eastern Tennessee. Saturday will be spent watching the kids race for eggs, eating great food, wonderful fellowship, hugs, laughter, and sadly missing my Aunt Linda. This will be the first gathering since her service in February, and I expect it will be a little bittersweet.
Since we are traveling, I have signed up to take sweet and unsweet tea (who actually drinks the unsweet? C'mon. You're doing it wrong) which requires zero temperature control needs. Guess what else? We will be eating lamb. Lamb! One of my very favorite foods, but unfortunately don't have often since it's kind of pricey. I hope nobody else wants any, because I might sneak it away into a remote corner and devour it in secret. Shhh.
Another Easter food favorite? Deviled eggs. I know there are many creative takes on the popular finger-food, but I must say, I'm a big fan of the classic deviled egg. Also, I wonder how they got their name. Any ideas?
Speaking of eggs, I think I might make a "surprise" dessert to take to TN with us. I say "surprise" because some of my family members read this blog. Really, though, it's just an excuse to make (and eat) rice krispie treats.

This recipe is from The Pioneer Woman, who I adore and like to pretend I am BFF's with. Is that weird? I don't think so either. You can find the original recipe here.
Krispy Easter Eggs
Prep Time: 20 Minutes Cook Time: 5 Minutes Difficulty: Easy Servings: 12
Ingredients:
Directions:
It's good to be back. Sorry for leaving you hanging last week. Things have been really busy around here, but thanks for sticking with me.
Can you believe it's almost April? I feel like March never actually happened. Where is the time going!?
With the arrival of April, means Easter is around the corner. I love Easter. Pastel colors, egg hunts, a delicious lunch, and most of all, the meaning behind the holiday.
This year, Spencer and I will be going to see my family in eastern Tennessee. Saturday will be spent watching the kids race for eggs, eating great food, wonderful fellowship, hugs, laughter, and sadly missing my Aunt Linda. This will be the first gathering since her service in February, and I expect it will be a little bittersweet.
Since we are traveling, I have signed up to take sweet and unsweet tea (who actually drinks the unsweet? C'mon. You're doing it wrong) which requires zero temperature control needs. Guess what else? We will be eating lamb. Lamb! One of my very favorite foods, but unfortunately don't have often since it's kind of pricey. I hope nobody else wants any, because I might sneak it away into a remote corner and devour it in secret. Shhh.
Another Easter food favorite? Deviled eggs. I know there are many creative takes on the popular finger-food, but I must say, I'm a big fan of the classic deviled egg. Also, I wonder how they got their name. Any ideas?
Speaking of eggs, I think I might make a "surprise" dessert to take to TN with us. I say "surprise" because some of my family members read this blog. Really, though, it's just an excuse to make (and eat) rice krispie treats.
This recipe is from The Pioneer Woman, who I adore and like to pretend I am BFF's with. Is that weird? I don't think so either. You can find the original recipe here.
Krispy Easter Eggs
Prep Time: 20 Minutes Cook Time: 5 Minutes Difficulty: Easy Servings: 12
Ingredients:
- 4 Tablespoons Butter
- 1 package (10 Ounces) Mini Marshmallows
- 6 cups Rice Krispies
- Assorted Sprinkles
- Small Chocolate Easter Eggs
- Plastic Easter Eggs
Directions:
- In a large saucepan, melt butter over low heat. Add marshmallows and stir until melted.
- Remove from heat, then add rice cereal and stir until well coated.
- Lightly spray interior of the plastic eggs with non-stick cooking spray. If mixture is too sticky, you can also spray your hands.
- Fill both sides of the plastic egg with rice cereal mixture, slightly over-filling one side.
- Press chocolate egg in the center on one side of the egg, then close the plastic egg to shape it. (It should be full enough to meet with a little resistance as you close it.)
- Gently release the rice cereal egg from the mold, decorate with your choice of sprinkles and set aside in egg crate until set.
Can I get an "amen!"?
Until next time - -
Friday, March 13, 2015
Mexican Progressive Dinner: Frozen Margarita Pie
If you missed the first two posts in the Progressive Dinner I'm doing with Christine from The So-Called Homemaker, click here to see the Black Bean & Goat Cheese Appetizer Recipe, and here to see Christine's Chicken & Black Bean Enchiladas. Yum!!
Today, we're finishing up our dinner with dessert and a cocktail, naturally. Keep reading to see my Frozen Margarita Pie, and when you're finished, be sure to click over and check out Christine's Pineapple Margarita recipe!

Ingredients:


Today, we're finishing up our dinner with dessert and a cocktail, naturally. Keep reading to see my Frozen Margarita Pie, and when you're finished, be sure to click over and check out Christine's Pineapple Margarita recipe!
Ingredients:
- 1 1/2 cups lightly packed small white marshmallows
- 2/3 cup half and half
- 1 tsp grated lime peel
- 1/4 cup freshly squeezed lime juice
- 1/4 cup tequila (I used Margaritaville Tequila Silver)
- 1 cup whipping cream
- 1 1/2 tbsp white granulated sugar
- Store bought chocolate or Oreo pie crust
- (Or make your own crust by grinding 20 thin chocolate wafer cookies in a food processor, and adding 2 tbsp melted butter to the crumbs. Put the mixture into a pie dish and use your fingers to press it down around the bottom and edges of the dish.)
Directions:
- In a pot, melt the marshmallows and half and half together until smooth.
- After the mixture is melted, nest the pot into a bowl of ice water and stir often until cool.
- Once cooled, add the lime peel, juice, and tequila and stir occasionally until the entire mixture is cold.
- In another bowl, combine the whipping cream with the granulated sugar, and with a mixer, whip until the cream thickens and forms soft peaks.
- Pour the cream and sugar mixture into the cooled pot, and fold together until well mixed.
- Pour the entire filling into the pie crust, and freeze (uncovered) for about an hour or until the center is firm to the touch. Then add the lid or wrap in plastic wrap and freeze until solid (at least 2 more hours, but I froze overnight).
- Before slicing, let the pie sit approximately 10 minutes so it can soften slightly.
- Eat plain, or add whipped cream and chocolate syrup like I did! Either way, it's delicious (trust me, I tried it both ways). :)
What other Mexican inspired desserts do you like, or would you love to try?
Don't forget to check out Christine's Pineapple Margarita recipe here!
Until next time - -
Thursday, March 12, 2015
Mexican Progressive Dinner: Appetizer Quesadillas
I am beyond excited to be teaming up with Christine from The So-Called Homemaker to put together a virtual Mexican Progressive Dinner! Over the next two days, Christine and I will cover four recipes for you to create a delicious and fun fiesta!
Today, I'm kicking off the dinner with an appetizer: Black Bean & Goat Cheese Quesadillas. The beauty of dishes like this one is that if there is an ingredient that you aren't fond of, you can either replace it with something else or leave it out altogether! It's so easy to customize to your own taste.
(Be sure to follow the link at the end of this post to see Christine's entree recipe today!)

I'm sharing today the recipe I used.
Ingredients:
- 1 can (13.5 oz.) black beans, drained and rinsed
- 6 oz. goat cheese
- 1 medium tomato, chopped and seeded
- Kernels from 2 ears of corn
- 1/4 of a red onion, diced
- 2 tbsp chopped cilantro
- Salt and pepper, to taste
- 6 inch corn tortillas
Directions:
- In a large bowl, mash the rinsed and drained black beans with a fork until about half are mashed and half are still whole.
- Add the goat cheese, tomato, corn kernels, red onion, and cilantro to the bowl. Season with salt and pepper, and stir until the goat cheese is well incorporated with the other ingredients. The mixture will be very creamy, as you can see in this picture.

- Once the mixture is ready, heat a cast iron skillet or an electric griddle to medium heat. Spread the mixture onto a corn tortilla - use as much as you wish, but remember that the more filling they have, the harder they'll be to flip without filling falling out!
- Place another tortilla on top, and place in the pan.
- Once you begin to see grill marks appear on the bottom, flip it over to heat on the other side. It is finished when both sides have some grill marks, and the mixture inside is warm.
- Cut into wedges and serve warm!
- You can serve with a side of sour cream or salsa. We substituted sour cream with Greek yogurt, and it was delicious!


Be sure to head here and read all about the entree recipe from Christine: Chicken & Black Bean Enchiladas!
Until next time - -
Friday, February 27, 2015
Recipe: Easy Hollandaise Sauce
Mmm - Hollandaise. That lemony, creamy concoction that tops off so many delicious dishes: filet mignon, asparagus, Eggs Benedict...
Sound fancy? It is! Sound difficult? It is NOT.
Traditionally, hollandaise is a sauce made with very close monitoring to temperature and constant whisking of the yolks, followed by the careful addition of butter and more whisking. Well, that just takes too much control and patience for a girl who likes to fly by the seat of her pants when cooking.
SO - I'm here today to share the simple recipe that my step-dad taught me. Prepare to be amazed at the talented French chef you have hiding inside of you!

Ingredients:


Do you have any food hacks for complicated recipes?
Until next time - -
Sound fancy? It is! Sound difficult? It is NOT.
Traditionally, hollandaise is a sauce made with very close monitoring to temperature and constant whisking of the yolks, followed by the careful addition of butter and more whisking. Well, that just takes too much control and patience for a girl who likes to fly by the seat of her pants when cooking.
SO - I'm here today to share the simple recipe that my step-dad taught me. Prepare to be amazed at the talented French chef you have hiding inside of you!
Ingredients:
- 3 egg yolks
- 1-2 tbsp. fresh lemon juice (amount dependent on how lemony you want it to be)
- Pinch of salt
- Pinch of cayenne pepper
- Approximately 6-8 tbsp. of unsalted butter (the more butter you add, the thinner the sauce will be)
Directions:
- Place your egg yolks in a blender and add the lemon juice, salt, and cayenne pepper.
- Melt the butter in a measuring cup in the microwave (with several small intervals of time, so the butter does not pop and bubble over).
- Once the butter is fully melted, turn on the blender (with the lid on and the top plastic piece removed) and begin slowly adding the melted butter to the yolk mixture.
- Continuously note the texture of the sauce in the blender so that you do not add too much butter.
- Once you're satisfied with the consistency, you're done! How easy was that?
Add this sauce to anything and everything. We enjoyed ours over Eggs Benedict with a side of Fried Grits. And yes, it was as delicious as it looks!
Do you have any food hacks for complicated recipes?
Until next time - -
Wednesday, February 25, 2015
Recipe: Fried Grits
Yes, you read that title correctly. Fried Grits. The formerly butter-loving Paula Deen would be proud.
Here in the deep South, we like most foods fried. Chicken, porkchops, bologna, potatoes, even vegetables (fried okra, anyone?). A new one for me, though, is fried grits. My step-dad, Mike, mentioned these to me when we were at my grandparents last week. Because I was going to spend a night at their house the following day, we decided we would make them so I could give them a try.

And, as most of my recipes usually are, these are inexpensive and easy!
First, make a pot of grits according to the package (yellow grits have a stronger corn flavor than white. Use whichever you prefer!). Line a loaf pan with plastic wrap, and when the grits have cooled, pour them into the pan. Refrigerate overnight.

When you remove them from the refrigerator and from the pan/plastic wrap, they will keep their shape, allowing you to easily slice the grits.

Heat a skillet, medium to medium-high heat, and melt a couple of tablespoons of butter (we tried both butter and vegetable oil. My mom preferred the oil - crunchier - while Mike and I preferred the butter - better flavor).
In a bowl, whisk 3 eggs. In a separate bowl, pour some all-purpose flour with some salt and pepper for seasoning. You will be using these to coat the grit slices before placing in the pan. We double coated them for a thicker crust!
Start by coating in egg, and then dredging through the flour. Repeat for a second coat. Then, place in your heated skillet.


When the bottom side is browned to your satisfaction, use a spatula and flip them over to brown the other side.

Here is a comparison of the butter (darker in color) vs. the oil (crunchier in texture).
Sprinkle with a touch of salt, and they're done!
What do you think? Is this something you would try? If you're on the fence, let me just tell you these were DELISH. And you totally should. Just trust me, ok?
Until next time - -
Here in the deep South, we like most foods fried. Chicken, porkchops, bologna, potatoes, even vegetables (fried okra, anyone?). A new one for me, though, is fried grits. My step-dad, Mike, mentioned these to me when we were at my grandparents last week. Because I was going to spend a night at their house the following day, we decided we would make them so I could give them a try.
And, as most of my recipes usually are, these are inexpensive and easy!
First, make a pot of grits according to the package (yellow grits have a stronger corn flavor than white. Use whichever you prefer!). Line a loaf pan with plastic wrap, and when the grits have cooled, pour them into the pan. Refrigerate overnight.
When you remove them from the refrigerator and from the pan/plastic wrap, they will keep their shape, allowing you to easily slice the grits.
Heat a skillet, medium to medium-high heat, and melt a couple of tablespoons of butter (we tried both butter and vegetable oil. My mom preferred the oil - crunchier - while Mike and I preferred the butter - better flavor).
In a bowl, whisk 3 eggs. In a separate bowl, pour some all-purpose flour with some salt and pepper for seasoning. You will be using these to coat the grit slices before placing in the pan. We double coated them for a thicker crust!
Start by coating in egg, and then dredging through the flour. Repeat for a second coat. Then, place in your heated skillet.
When the bottom side is browned to your satisfaction, use a spatula and flip them over to brown the other side.
Here is a comparison of the butter (darker in color) vs. the oil (crunchier in texture).
 |
| Fried in butter. |
 |
| Fried in oil. |
Sprinkle with a touch of salt, and they're done!
What do you think? Is this something you would try? If you're on the fence, let me just tell you these were DELISH. And you totally should. Just trust me, ok?
Until next time - -
Friday, January 30, 2015
Recipe: Leftover Loaf
I've mentioned in other recipe posts that I enjoy playing a game with myself where I will choose an ingredient, and built off of it in an attempt to make an edible meal. This was the case when I made up what I have dubbed "Leftover Loaf." (Thanks to Kristi with the alliterative suggestion!)

The basic concept is to take anything in your pantry or refrigerator and toss it in some ground beef or turkey to make a meatloaf. Sounds easy enough, right? It is.
The basics ingredients:


The basic concept is to take anything in your pantry or refrigerator and toss it in some ground beef or turkey to make a meatloaf. Sounds easy enough, right? It is.
The basics ingredients:
- Ground beef or turkey
- 2 eggs or equivalent egg whites
- A dry ingredient (bread crumbs, crumbled saltines, stale Cheerios, etc.)
That's it! The rest of the ingredients depend on what you have to use up. Here are some ideas:
- Canned beans
- Leftover cooked vegetables
- Half cut onion
- Unused greens
- Raw carrot (try grating it!)
- The possibilities are endless
Just mix all of your chosen ingredients into a bowl, mix it together (I used a potato masher because, ew). Form it into a loaf shape on a broiler pan (to allow grease to drain) and bake in a pre-heated 375 degree oven for about 45-50 minutes or until it's beginning to brown and is cooked through. Easy-peasy!
Here is what I used to create my Leftover (Turkey) Loaf:
Ground turkey, Italian bread crumbs, the last of a carton of egg whites, minced garlic,
1/2 red onion, leftover diced jalapeno, and some Parmesan cheese
Mix
Bake
It's ready!
Cut, serve and devour.
I'd love to hear any other ingredients you would include in your Leftover Loaf! Share them in the comments. I may use your ideas in my next loaf. :)
Until next time - -
Wednesday, January 28, 2015
Recipe: Homemade Pizza Sauce
I love Mondays! Well, I love Monday nights. Now that another season of The Bachelor has started, I'm back to my Monday girls' night. We rotate homes and watch The Bachelor (or Bachelorette), and the host home is in charge of dinner (the others are in charge of wine). Because most of our gal pals have moved away, its just Casey and myself for now.
(Bonus: I get to take advantage of the weeks she hosts by sneaking in some baby Colin kisses before he goes to bed!)
I hosted this past Monday night, and it dawned on me that I had nothing planned for dinner! I considered picking something up, but she made such a delicious dinner last week, I hated to not put any effort into it. Spying a can of peeled tomatoes in our pantry, I decided to make homemade pizza. (Because that's the natural connection that my brain makes...can of peeled tomatoes...pizza!)

After looking at a few recipes online, I decided I didn't need anything extra in order to make the sauce. I had everything (or a substitute of everything) on hand. Which just helped justify my decision!
Here is the recipe that came out of my efforts. The beauty of making your own sauce is that you can customize it to your own taste. Like garlic? Add more! Like it sweeter? Toss in a little sugar! It's up to you.
And, since you know I love anything that freezes, I split the leftover sauce in half and put 2 bags in the freezer for future meals (spaghetti, another pizza, etc.). Yesssss.

Ingredients:


(Bonus: I get to take advantage of the weeks she hosts by sneaking in some baby Colin kisses before he goes to bed!)
I hosted this past Monday night, and it dawned on me that I had nothing planned for dinner! I considered picking something up, but she made such a delicious dinner last week, I hated to not put any effort into it. Spying a can of peeled tomatoes in our pantry, I decided to make homemade pizza. (Because that's the natural connection that my brain makes...can of peeled tomatoes...pizza!)
After looking at a few recipes online, I decided I didn't need anything extra in order to make the sauce. I had everything (or a substitute of everything) on hand. Which just helped justify my decision!
Here is the recipe that came out of my efforts. The beauty of making your own sauce is that you can customize it to your own taste. Like garlic? Add more! Like it sweeter? Toss in a little sugar! It's up to you.
And, since you know I love anything that freezes, I split the leftover sauce in half and put 2 bags in the freezer for future meals (spaghetti, another pizza, etc.). Yesssss.
Ingredients:
- 28oz. can of peeled tomatoes
- 4-5 tbsp. of Italian seasoning
- 1/4 cup olive oil (not pictured)
- 2 tbsp. red wine vinegar
- 1 tbsp. of minced garlic
- Salt and pepper, to taste
Directions:
- Put all ingredients into a large bowl.
- Mix with an immersion blender (don't be like me and lift it up out of the mixture. It will splatter red all over your freshly painted cabinets). It was actually my first time using it - I got it from Santa Claus and was SO excited when I opened it! I need to find more things to use it for. It's fun!
- Taste the sauce. If it needs more seasoning, add more. More salt? Toss in another pinch. This can be totally customized, so go for it!
- There are no more steps. Move on to your recipe! It's as easy as that :)
Do you have any recipes that I could use my leftover red sauce in? Please share!
Until next time - -
Subscribe to:
Posts (Atom)