Showing posts with label DIY. Show all posts

Friday, May 1, 2015

DIY: Refurbished Front Porch Light

So, two years ago (almost to the day), Spencer and I purchased our first home. It was super exciting to have a place to play around with paint and decor! The possibilities of projects around the house made my head spin (in a good way), and it seems that once one project is complete, another takes its place. Can you relate (please, tell me I'm not the only one...)?

Well, one of these projects that I swore I would take care of ASAP, just got finished. As in, this past weekend. 

The front porch light.


It was white plastic, and I'm sure was original to the home. It was dirty (I know, I could have cleaned it), and finally the bulb burned out. Well, instead of replacing the bulb, I used it as motivation to get this little project done. It only took another two months after that :) . Better late than never, right?

This is the poor little guy we started with. So sad. Womp, womp...


 Gross, right???

Well, my sister-in-law gave me the front porch light from her old house. It is MUCH better, but being brass, just didn't match.


 So, like any thrifty DIY-er would do, I dug up some spray paint from the garage cabinet, paint-taped (is that a verb?) that snot out of it, and got to spraying! But, um, problem. Because there always has to be a problem. My brain was on vacation that day, and I forgot to tape off a very important part. The open bottom. Duh. So when I began spraying...yep, you guessed it. I sprayed the entire INSIDE of the glass. Just keepin' it real, y'all.

Nothing that a little (or a crap-ton - I know, also not a real adjective. Just work with me) elbow grease can't get off. I used a Brillo pad and kept right on rolling, pretending it never happened.


Finally, I helped my handy (and handsome) hubby install it. And by "help," I mean I stood at the bottom of the ladder and took pictures. You're welcome, babe.


And, voila! Much better, no?


What DIY projects do you keep putting off?


Until next time - - 


Wednesday, February 18, 2015

Laundry Room Art: Single Socks

Happy Hump Day!

First, thank you to everyone who left sweet comments on Monday's post regarding my aunt's passing. Your words, prayers, and emails meant so much to me! I feel so lucky to have such caring friends, readers, and fellow bloggers.

So today I wanted to share adorable printables designed by Marielle at The Resplendent that I discovered via my Real Simple email. 

She has shared 4 FREE printables that you can print, frame, and hang in your laundry room. Just glue some clothes pins to the frame and VOILA! You have a place for those mysterious single socks to wait for their perfect mates. 

I'm going to print and frame the one in the picture below - which one will you choose? Just click HERE to view the others and to download.

Aren't they clever!?


Until next time - - 


Friday, February 6, 2015

Kitchen Cabinet Makeover: Part II

I left you on Part I of this project with my father-in-law painting doors in the freezing cold garage (did I mention what a trooper he is?). - If you missed Part I, you can catch up here.


Once the everything had 2 coats of the chalk paint, I went back and sealed everything with one coat of Minwax water-based polycrylic for a few reasons. One, I have experience with it. Two, it is more durable for something that will get a lot of use, like kitchen cabinets, than the wax that is recommended for chalk paint. And third, I went with a water-based rather than an oil-based to avoid the cabinets yellowing.

Once everything was FINALLY painted and sealed, I got to hang it all back up! It was so nice to again hide the mess that is inside of our cabinets (which I begrudgingly shared in Part I - but hey, gotta keep it real). 

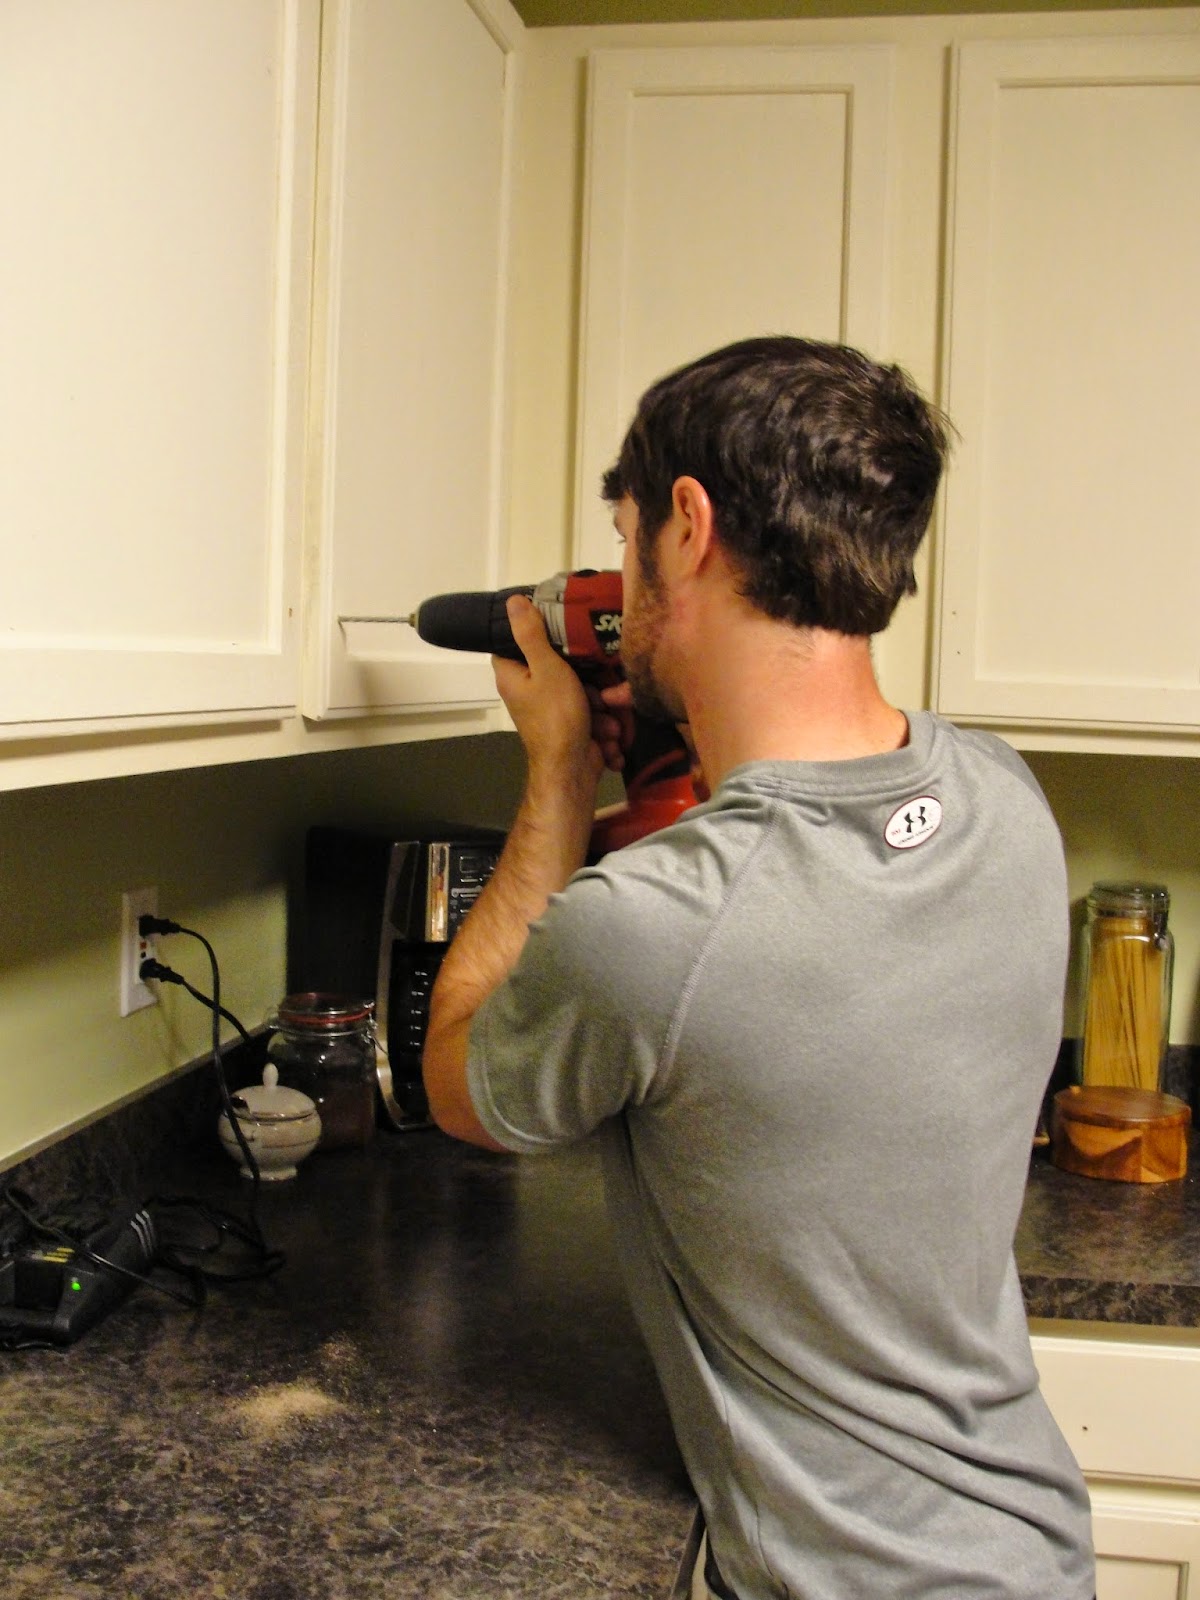
For hardware, I went with oil rubbed bronze, which is a current favorite finish of mine. I like the look of pulls for drawers (we got these) mixed with knobs for doors (we got these), so that's what I went for! I ordered online from Lowes.com because my local Lowes didn't have as many as I needed in stock. They finally arrived, and when Spencer had a couple of free nights, he measured and made two templates - one for the drawer pulls and one for the door knobs. Clever, isn't he?


He marked where the holes needed to be drilled with a pen, and went back in and started drilling. I followed behind him putting the knobs and pulls in place. Easy, peasy!


Are you ready to see the final results?


Are you sure?


Are you really sure??


Ok...here we go!


What do you think? Is this a project you would take on?

What DIY projects are on your list?


Until next time - - 


Wednesday, February 4, 2015

Kitchen Cabinet Makeover: Part I

Update: You can see Part II of the Cabinet Makeover here.


In April 2013, Spencer and I purchased our first house. It's a 3 bedroom, 2 bathroom home with a small fenced in yard. The first viewing, we both felt very strongly that it was meant to be our home. One thing I just couldn't get past (which of course didn't keep us from buying, as it was changeable), were the kitchen cabinets. They were your average, builder grade "oak" cabinets. They also had no hardware, which I thought was strange (and after living with them, I would get irritated when I'd open a drawer and it would catch my fingernails). 

Monday, January 5, 2015

Rocking Horse Re-Do


Just before Thanksgiving, I went into a new furniture and paint shop in town to look at her paint selections. In the shop I found an antique rocking horse that could be purchased as-is, or purchased and for an extra charge, the shop owner would re-do it for me. Because I'm so in love with my niece, Avia, I instantly thought of her when I saw it. Knowing both her first birthday and Christmas were just around the corner, I quickly purchased and drove away with it.


To complete the project, I used the same materials as I used for my Craigslist dresser, because I had enough of everything left and Avia's bedroom just happens to have the same color green in it!


After two coats of paint


Some distressing to preserve the "antiqueness"

My original plan was to purchase a monogram sticker with Avia's initials. After some thought, I decided I want the rocking horse to be able to be used for Avia's brother(s) or sister(s) if and when that happens. So then my plan changed to tracing and painting a "T" on the horse, their last initial. As I searched Hobby Lobby, nothing really jumped out at me. Until I wandered down the scrapbook aisle, that is.

I looked (for about 45 minutes) at so many different sticker sizes, phrases, and pictures, until I finally settled on a pack that contained one that said "Enjoy the Ride". Perfect, right? It's a rocking horse! Get it??? :)


With the sticker added

Finally, I sealed the horse with a water-based polycrylic to preserve both the paint and the sticker through hopefully many years of rocking!

Adding a coat of sealant

With a bow and a gift tag, the horse was all ready for Christmas morning! (Please excuse the mess on the carpet and around the room. It was Christmas morning, after all! I know y'all can relate). 


I am thrilled to report that the gift from Uncle Spencer and Aunt Morgan was a big hit, and was certainly One Year Old Approved! 

Ride on, sweet girl! :)


Until next time - - 


Friday, October 24, 2014

The Big Reveal!

(This is Part 2 of the dresser makeover posts. You can click here to go back and see Post 1).

It's Friday! I've been waiting on this day all week. Not only do I leave after work today go to on a girl's mountain weekend with 2 of my besties (more to come on that...), but it's also the day of the dresser reveal!

...I know, you've all been chomping at the bit to see it...

Before we get to that though (collective groan from my edge-of-your-seat audience), I should start with the "before" of my living room. We had a very nice, but too-small-for-the-room TV console. It just wasn't the proper scale for the room. These were taken last year when I first hung the curtains.


Baby console, giant TV.

Repeat picture, zoomed in.

So, now that you see the space I was working with, you understand the scale dilemma.

Just as a reminder from Friday and Monday's posts, this is what the original dresser looked like (and please note the missing hardware from the left cabinet door. No telling where that ended up. The poor, lonely little orphan knob - lost, lonely, and collecting dust - almost as much dust as is on the bottom of this dresser - almost).


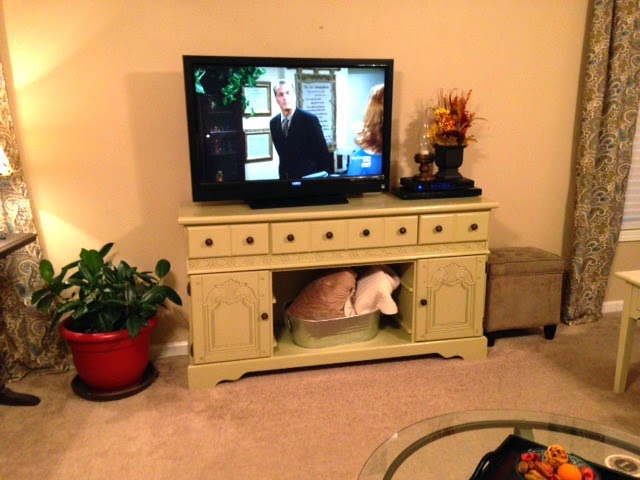
So now, without further adieu, here is the freshly madeover dresser! It's like she just came back from "What Not to Wear," only with paint and knobs instead of makeup and accessories. Yes? Anyway...


Please excuse my "office" by the window (I'm thinking a new chair is in order). And Reba on TV. Spencer loves that show (just kidding - it might have been me).

I'm welcoming suggestions for the wall area surrounding the TV. Does it look ok, or does it look too empty? I know gallery walls are popular and one would look great there, but I have a small one on the opposite wall, so two may be overkill.

Thoughts?

Enjoy your weekend! I'm excited to wear boots and leggings and eat fall food and sit by the fire :)

What are your weekend plans? Anything fall-themed?


Until next time - -

Monday, October 20, 2014

Dresser Project is Under Way...

On Friday I showed a couple of pictures of a dresser that I have been planning to redo for ages. Finally, the project is under way!

I decided to give the popular Annie Sloan chalk paint a try. It isn't the least expensive paint on the market, but promises to cover any surface with minimal prep. Because the dresser I have is laminate rather than wood, I figured I should use something that would stick to the surface better than paint. If using the paint with wood, you shouldn't have to do any prepping. I did sand the laminate a bit with a sanding block to decrease the "slick-ness" of the laminate and help the chalk paint adhere.

I chose the color "Versailles," which is a very pale shade of green.


You can see in the picture below, after the first coat, the areas that I didn't sand enough (see the inside of the lower left cabinet).


The second coat was much more successful - it covered the areas that the first coat missed. 


After the second coat dried, it was time to move forward with a protective coat. The recommended product to cover chalk paint is Annie Sloan's soft wax. I chose to apply a polycrylic instead, due to the price difference between the two. 

It's important if you use a polycrylic to choose one that is water-based. An oil-based polycrylic will yellow over time, particularly when exposed to a lot of sunlight. 

This post from Jenniferrizzo.com is a great resource when deciding between a wax and a polycrylic top coat.


Because nothing can be simple, after I finished painting the second coat of chalk paint, I realized that the cabinet doors had two holes for a knob or pull instead of one. The strange thing about that, is the back side of the cabinet door only had one hole. Hmm...

So after coat two of the chalk paint was dry, I filled in one hole on each door with spackle, let it dry, and sanded it back down. I then applied a third coat of chalk paint to the front of both cabinet doors. 

Wish I would have noticed that before starting. #fail


Two holes on the front, one hole on the back...


Spackle it up...


Sand it down...


Thus ends part one of the dresser project posts. I still need to finish applying the coats of polycrylic (one more for the dresser and drawers, and 2 for each side of the cabinet doors.

Then I'll apply new knobs and "install" in its new home in the house!

Happy Monday! And if you have any additional suggestions or advice for this project, please leave a comment for me. I am learning as I go!

(You can see the final results here).

Until next time - -